
The materials for this tent were created by staff at the Veterans Curation Program (VCP) laboratory in Augusta, Georgia. The VCP is operated through a contract with the U.S. Army Corps of Engineers with the mission of hiring veterans to process archaeological collections and assisting veterans in transitioning into the civilian workforce. To learn more, visit the VCP website, Facebook, and Instagram pages.
Introduction
What happens to artifacts after an archaeologist digs them out of the ground?

In the field, artifacts are placed in a labelled bag before being taken to a laboratory where they can be cleaned and sorted. It is important to keep artifacts organized and stored in appropriate conditions so that we know where they came from, and they do not get lost or damaged.
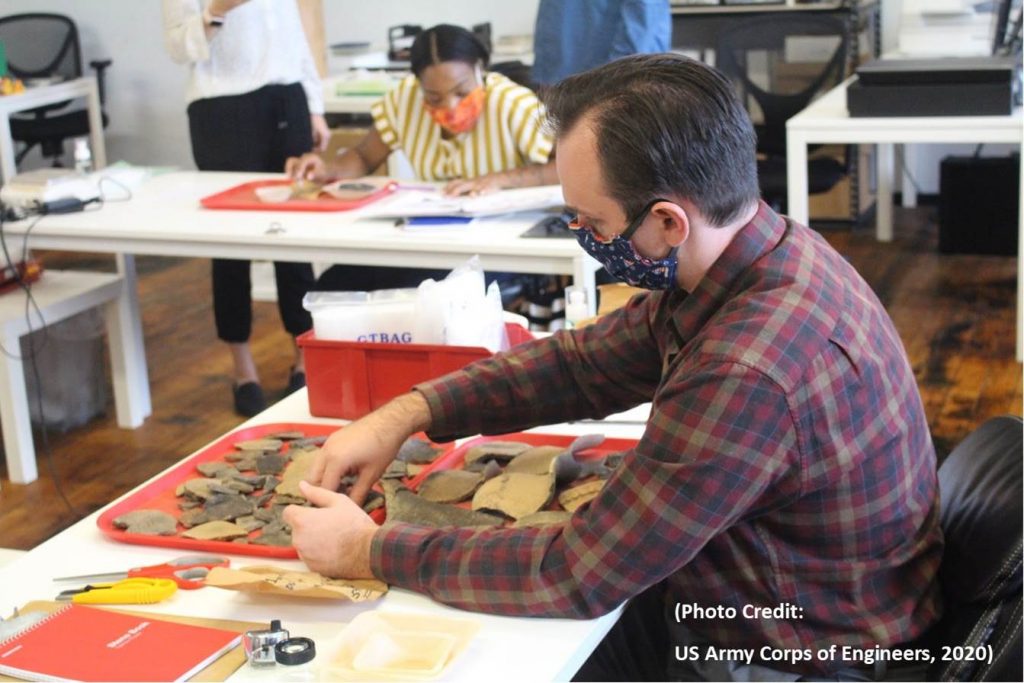
At the Veterans Curation Program, Laboratory Technicians help to sort artifacts from different excavations and keep the artifacts in good condition for future researchers to study them. Laboratory Technicians identify the artifacts and sort them into different groups based on where the artifacts were found and what material the artifacts are made of. For example, a rusty nail (metal) would be separated from a shard of glass because they are made of different materials. They would also need to be separated because the nail might damage the glass if they are kept in the same bag. It is okay to put a lot of rusty nails together in one bag, or a lot of broken glass in a separate bag, because artifacts of the same type are less likely to damage each other.
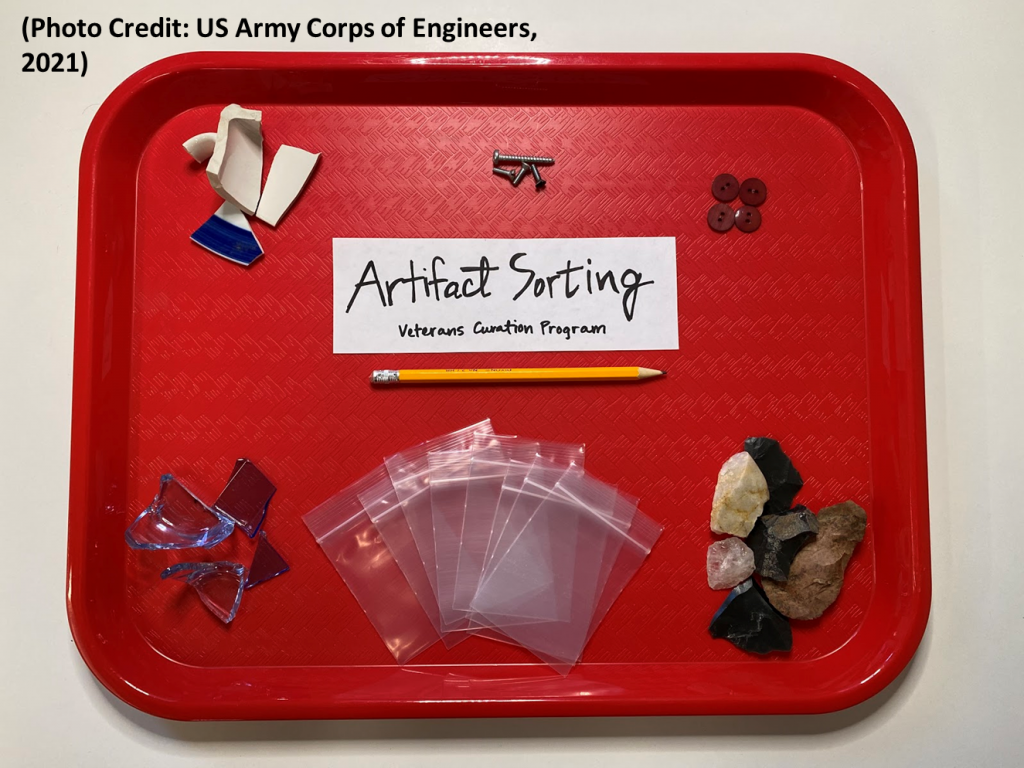
Once the artifacts are sorted, it is important to create an artifact tag which will identify what the artifacts are and where they were found, plus any other relevant information (e.g., weight, count, interesting designs or features, etc.). The tag will stay in the artifact bag with the artifact when the artifacts are put into long-term storage.
Activity: Sort and Label Your Artifacts!
- Print the Bags, Artifacts, and Tags (see below). If you want to challenge yourself, print the tags that have the “Artifact Description” included.
- Carefully cut out the Bags, Artifacts, and Tags. Be careful not to mix Bag One and Bag Two artifacts!
- Once the Artifacts are cut for Bag One, mix them up (like a deck of cards) and then put them next to your Bag One label. Do the same for Bag Two. Be careful not to mix Bag One and Bag Two artifacts! Now you are ready to start!
Bags
Artifacts
Tags
Imagine you are an archaeologist in the laboratory, and you have two bags of artifacts from an excavation in Georgia. The bags are from different parts of the site and labeled with important information you will need to use to fill out your artifact tags.
- Your first job is to make sure you do not mix the artifacts between the bags. Be very careful to make sure you keep Bag One artifacts with Bag One and Bag Two artifacts with Bag Two. Archaeologists need to know exactly where the artifacts came from in order to do their job!
- Your second job is to sort the artifacts based on the material they are made out of (e.g., bones, metal, stone) so that they can be safely stored for future use. You should have separate piles for Bag One and Bag Two artifacts.
- Finally, create a tag for each pile of sorted artifacts. The tag needs to include the information from the bag your artifacts came in and the type of artifacts that are in that pile.
| Material Class Examples | Artifact Description Examples* within Material Class |
| Ceramic | Plate, bowl, pot, rim, handle, fragment |
| Metal | Nail, screw, hardware, button, utensil |
| Plastic | Button, game piece, fragment, toy |
| Bone | Skull, vertebrae, tool, needle, teeth |
| Stone | Projectile point, flake, drill |
| Shell | Whole, fragment, bead |
| Antler | Whole, fragment, tool, handle |
| Glass | Toy, fragment, neck, bottle |
| Composite (Multiple Classes) | Shoe, battery, tool |
*The Artifact Description examples provided may or may not be in your artifact collection. You may think of additional descriptions to use too!
With your artifacts sorted and piles labeled, you know that you have helped current and future researchers, as well as the public – great job!!
Discussion Questions
- Did you notice similar artifacts in Bag One and Bag Two? Why do you think it is important that we not put these artifacts in the same piles?
- Can you think of any artifacts that should not be stored together? Why or why not?
- Why is it important to make sure the artifacts are labelled? What can archaeologists learn from cleaning and sorting artifacts based on material class?
- Once the artifacts are sorted and labelled, they will be stored in bags and boxes and moved to a storage location (similar to museums). Why is a building like a museum a good place to store artifacts? What would be a bad environment to store artifacts?
- You may notice on the print out that some of the artifacts are categorized as “Pre-contact” and “Post-contact” artifacts. Based on your observation, what differences do you see between these categories, and why do you think they are separated this way? *Hint: “In 1492, ________ sailed the ocean blue.”
Instructors
To check the answers to this activity, use the Answer Guide PDF. The artifacts are sorted by material class on each page and include artifact descriptions as well.
The purpose of this activity is to demonstrate what happens to artifacts after they come out of the ground and reinforces two important points: 1) retaining information about where the artifacts came from and 2) why sorting artifacts based on their material helps to protect the artifacts. These two principles are the foundation of collections management.
- Archaeologists call the information about where artifacts came from “provenience.” It is important that provenience is retained because it provides context for the artifact. Without context, artifacts are (mostly) worthless scientifically. This also creates an opportunity to talk about why it is important to leave artifacts where you found them.
- The site number used here (9GA6) is made up, but does follow what is called the Smithsonian Trinomial System used by archaeologists across the United States. The first number represents what state the site is in: 9 is Georgia. The letters represent a county (fictional in this case). Finally, the last number is the site, which increases every time a new site is reported.
- Units are a basic type of hole that archaeologists excavate. They are generally 1 meter x 1 meter square.
- Levels measure depth, generally in 10 centimeter increments, but sometimes by changing soil types.
- Because different materials have different properties, including hardness/brittleness, susceptibility to chemical reaction, organic vs. inorganic, and more, collections managers separate them to keep those properties from interacting with each other. A bag full of only ceramic plate fragments is much more stable than a bag with ceramic plate fragments, bones, and metal nails.
- The Veterans Curation Program refers to what the artifact is made out of as “Material Class” and the type of artifact as its “Artifact Description.” The basic goal of this activity is to sort into Material Class, but we have provided an optional sheet of tags to further sort the artifacts into Artifact Descriptions.
In regards to Discussion Question #5, “Pre-contact” refers to the eras before European arrival in North and South America. Pre-contact artifacts were made by Indigenous peoples using materials like wood, stone, bone, clay, etc. “Post-contact” refers to the eras after European arrival. It is only after contact (post 1492), that we begin to see materials like metal, porcelain, and European animal bones appear at sites.
Standards Connector
Kindergarten SKE2. Obtain, evaluate, and communicate information to describe the physical attributes of earth materials (soil, rocks, water, and air).
b. Construct an argument supported by evidence for how rocks can be grouped by physical attributes (size, weight, texture, color).
Kindergarten SKP1. Obtain, evaluate, and communicate information to describe objects in terms of the materials they are made of and their physical attributes.
a. Ask questions to compare and sort objects made of different materials. (Common materials include clay, cloth, plastic, wood, paper, and metal.)
b. Use senses and science tools to classify common objects, such as buttons or swatches of cloth, according to their physical attributes (color, size, shape, weight, and texture).
Second Grade S2P1. Obtain, evaluate, and communicate information about the properties of matter and changes that occur in objects.
a. Ask questions to describe and classify different objects according to their physical properties. (Clarification statement: Examples of physical properties could include color, mass, length, texture, hardness, strength, absorbency, and flexibility.)